Item Modeling
Credits: Robinette
I would love to see some creations people come up with to so, feel free to post yours.
(Anyone feel free to to pm me to add on the the guide)
I thought I might as well include some links to the trial software to:
Software Needed:
3D Studio Max
Optional Software (For skinning)
Photoshop CS2 (Or CS3)
Both of these are quite expensive software so you wont get the full versions for "Free"
Although theres always.....
other solutions
Guide Start
The way 3D Studio Max saves, it can add in a .bmp texture already on the model, through use of the materials tool.
Use a simple cylinder like shown:

0.75 radius is perfect size for a handle
Now open up the materials tool, by clicking M:
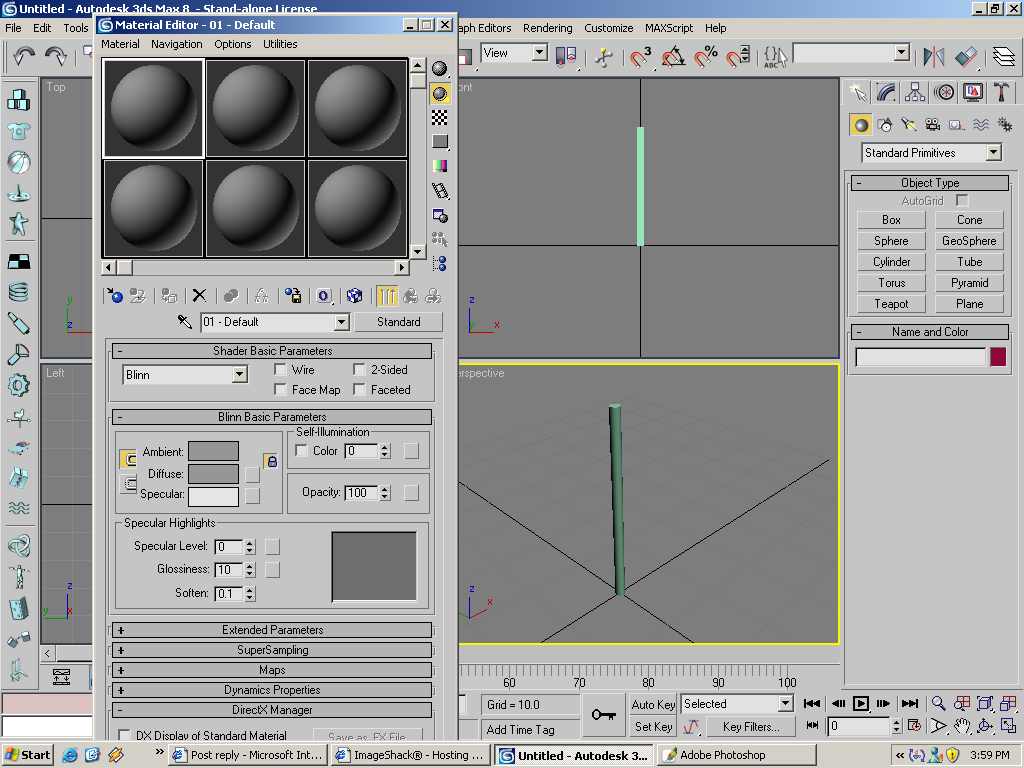
Clicking the little grey square next to diffuse under the basic parameters, will bring up the maps/materials browser:
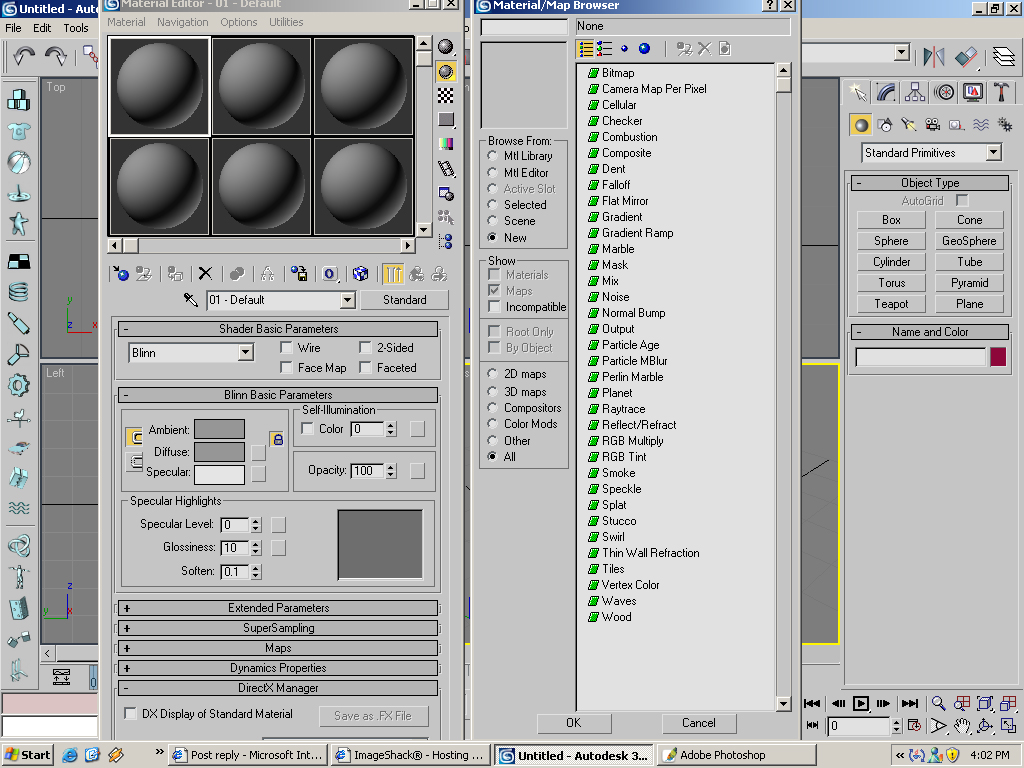
Choose bitmap at the top of the list. Now it will ask for you to find a
.bmp This will be your texture. I picked a random bmp from the
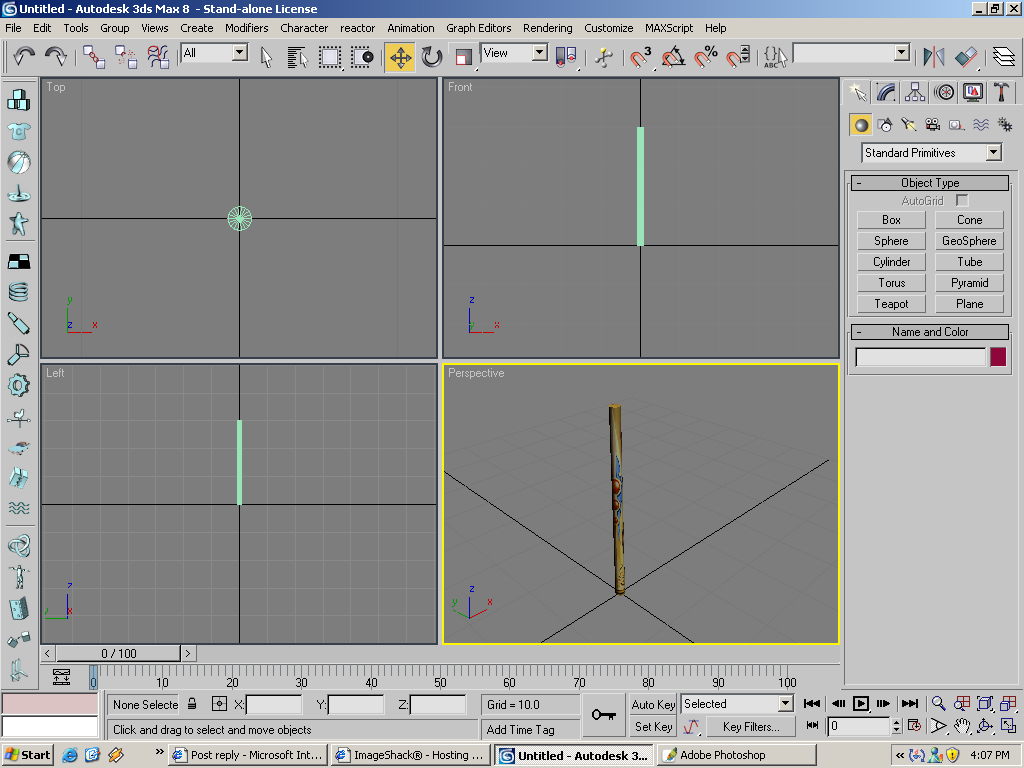
/dropitem folder. When your finished creating your .bmp and texture,
drag and drop your texture to your model: (first, check to make sure
you click "show map in viewport", this looks like a cube with
blue/white checkers on it. Clicking this will show your texture. If you
dont click it, the texture is still there, just not visable)
Now we have a simple cylinder with a texture:
-----------------------------------------------------------------------
Holding the item:
This part is a bit more advanced, and can take multiple trial and error
attempts to get the item positioning just right on the character. This
is very simple when using swords/axes, but may take a few attempts when
skinning a bow/jav etc.
Start by click "Hiearchy", next to modify tool(marked by a red circle):
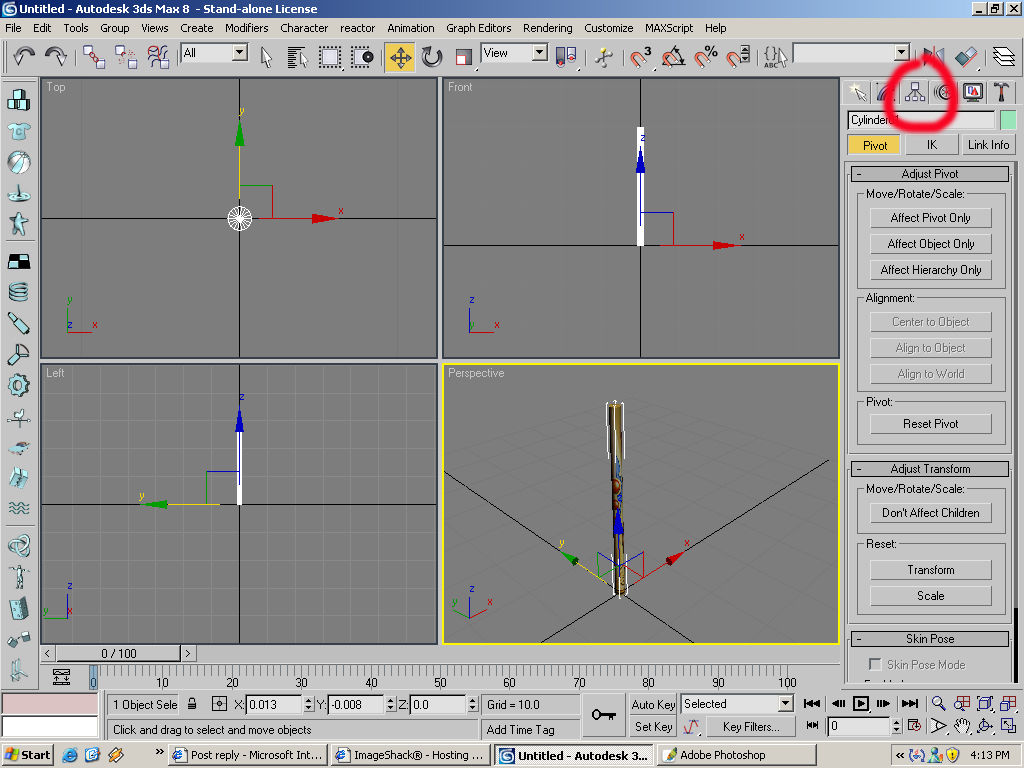
Now, under "Adjust Pivot" Dropdown, click "Affect Pivot Only". Doing so
should now show the X Y Z axis around the model. The center point of
these is where the item will be held, depending on character position
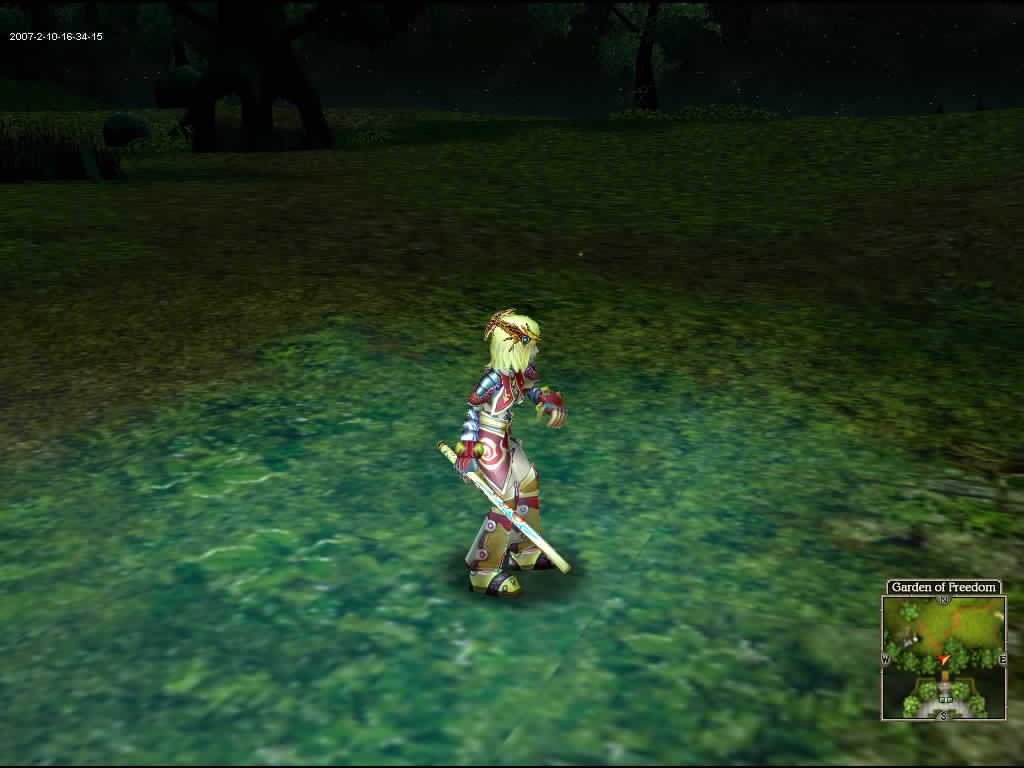
and weapon type. Since we are using a cylinder, and going to replace a
sword texture, the grip position is dead center. But since we are
trying to hold like a sword, we need to adjust it some.
Your item should look like this, with the 3 axis centered at the grid and bottom of item:
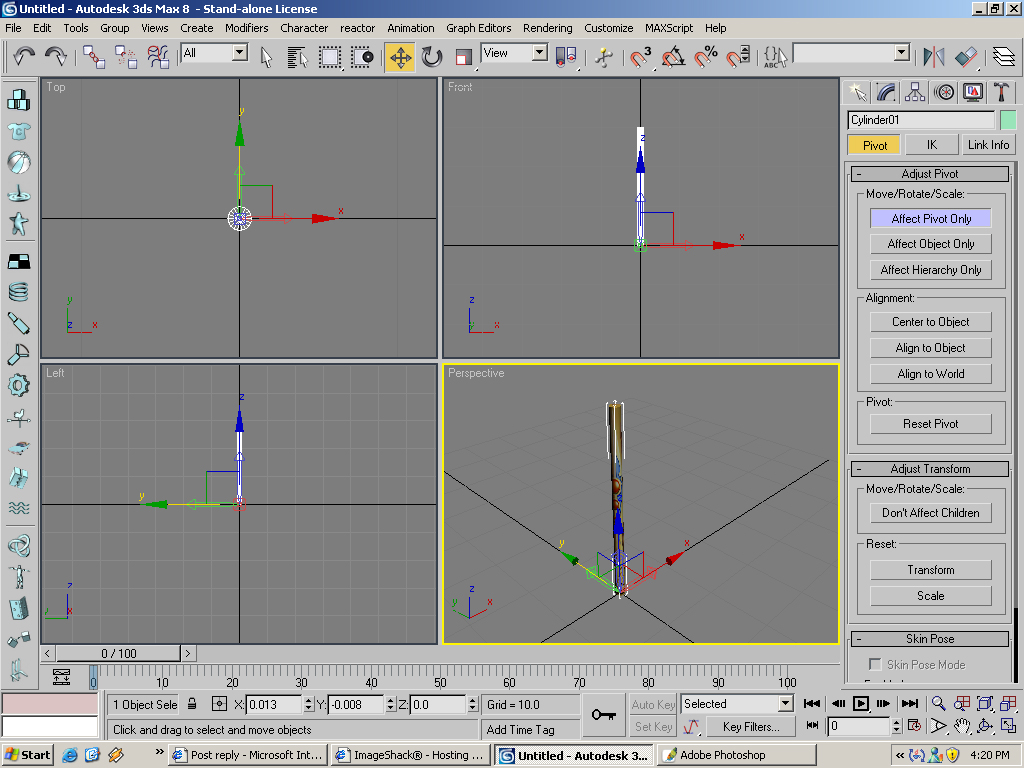
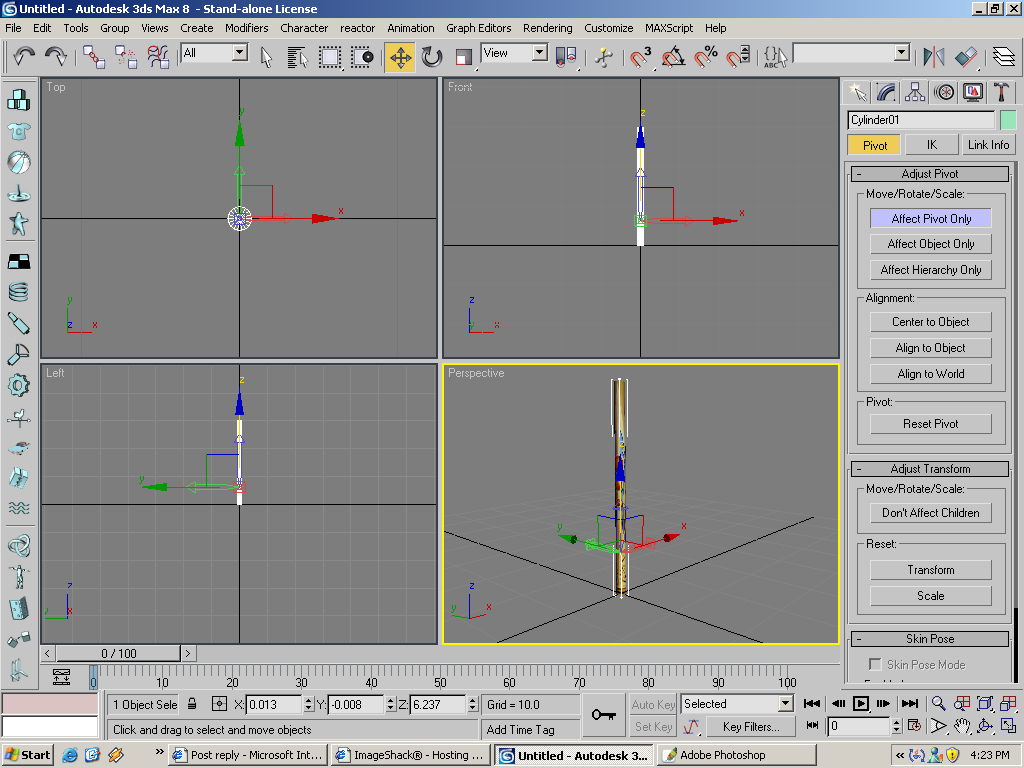
Click the Z (blue) axis and drag it up slightly. Imagine the is where the character's hand is. Now it should look like this:
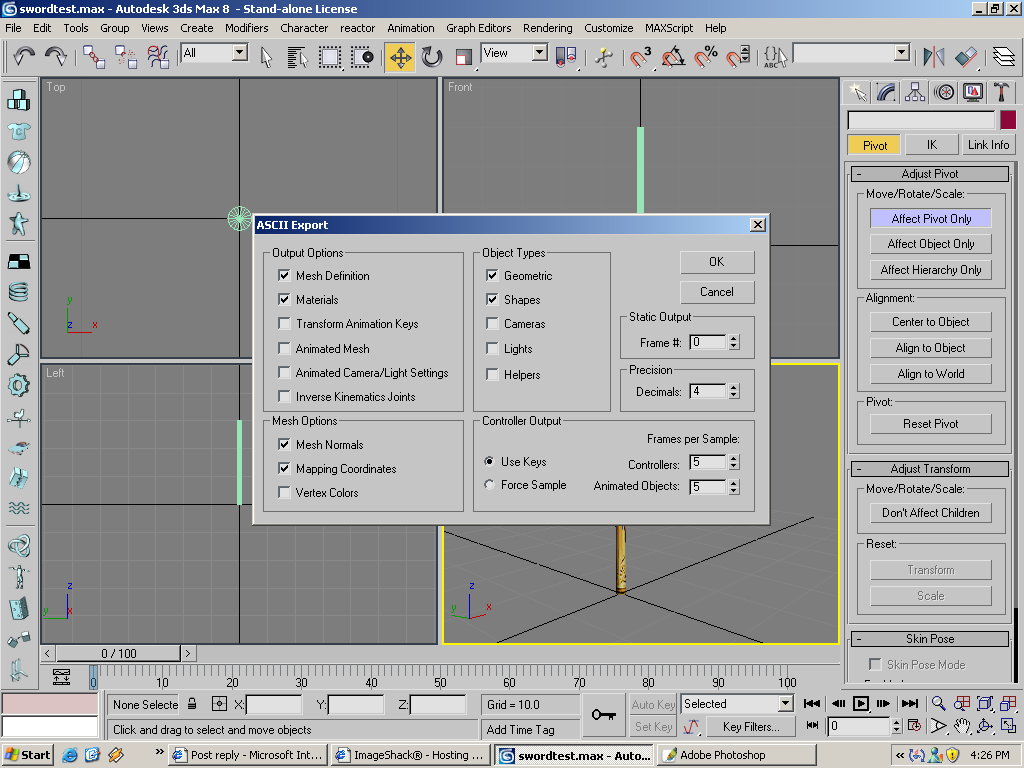
Time to save and export! Save as "swordtest" into your 3dmax 'Scenes'
Folder (default path). Now click file, and export as an .ASE
Use following export options:
[IMG]file:///C:/Users/SiK/AppData/Local/Temp/moz-screenshot-1.jpg[/IMG]Use the following export options:
When exporting, be sure to overwrite an existing model. I used itws204
(short sword). VERY IMPORTANT: After exporting your *.ase to /dropitem,
go into your dropitem folder and remove the *.smd file your trying to
replace. If you do not remove it, you will get a blank model. Run the
game and see your work!